Table of Contents
Welcome!
Quick short introduction to myself, my name is Alexander Trost. I’m a sysadmin who loves automation, containers, coding in Go, playing games but also with new technologies. I’m currently working at Cloudical as a DevOps Engineer, helping companies move to the cloud and / or to container technologies (e.g., Docker, Kubernetes, etc).
Goal of the Training
The training is going to show how simple it is to get started with containers. In this case Docker is used, as it is the most popular container toolchain and runtime right now. After getting to know containers and Docker, we will hopefully realize that there is a need for some kind of magical orchestration layer to run applications and more in containers (in an orchestrated way). The important if you haven’t noticed here is the orchestration of containers in an automated and orchestrated manner.
Goal of the day
Goal of the day is to setup a Kubernetes cluster using the official Kubernetes tool kubeadm and deploy an example application consisting of multiple applications (application, database, cache, etc).
In the process of setting up the Kubernetes cluster with kubeadm, we will look at the architecture of a Kubernetes cluster. This will show how Kubernetes does the container orchestration and what additional features it brings. After that everyone should have a basic understanding what is needed to run a Kubernetes cluster and how to deploy an application to it.
Container Orchestration Tools
The right tool for the right workload. Keep that in mind or you’ll have problems soon.
There are many container orchestration tools available, to name a few here is a list:
- Docker Swarm
- Mesos by Apache
- Rancher by Rancher Labs
- Portainer by Portainer Team
- Nomad by Hashicorp
- And many more..
There are a lot of tools available to orchestrate containers with. Problem is with so many tools available, to find the one that fits your use case.
As you kind of have potentially already decided, in this training we will go over Kubernetes.
For me personally the reason is that
A wild Docker Swarm appeared. Kubernetes used rolling update. It was very effective.
*Insert Pokemon battle between Docker Swarm and Kubernetes here*
The choice of the orchestration tool, depends on many factors:
- What workloads are you going to handle? How many containers would you run? What features do you need from the platform for your application to run smoothly?
- Where do you want to run your workload? In the cloud? On premise?
- What are your security requirements?
- What integration possibilites does the orchestration tool offer? E.g., Istio - Service Mesh Proxy / Routing.
My choice when I initially got into the container orchestration topic were Docker Swarm and Mesos by Apache. After “playing around” with both, I concluded for me that Docker Swarm was not mature enough from itself and the ecosystem around it, Mesos by Apache on the other hand was interesting to play around with, but after I have tried out Kubernetes it just felt “better. Some of the other reasons for me to use Kubernetes are and were that if you know what you are doing it is pretty easy to use with the right tools, developed by Google who have long experience with containers (from what they tell they are also one of the longest and largest users of containers) and, I know weird point for someone running Kubernetes privately, but Kubernetes can scale up to 5000 nodes (version v1.14). Most users will never reach this amount of nodes but still it is good to know it could and it would if you should ever have the need for so many nodes.
If the ecosystem / community around a software project is very important for you, I can safely say that Kubernetes is there. “Most important” is also that not only individuals are working on Kubernetes, but also many many companies come together to work on Kubernetes the project itself and the ecosystem around it.
There are probably more reasons to like and / or dislike Kubernetes, but that is up to you now! I hope you can form yourself a good opinion on Kubernetes, even though a very much opinioated person is holding the workshop. ;-)
Kubernetes
Kubernetes Logo
So what has Kubernetes to offer? - Features of Kubernetes
Kubernetes is a framework - Paint your picture in!
Kubernetes is “just” a framework. It gives you basic abilities to run containres, make them available to the outside, make storage available for your application and more.
But even Kubernetes features have an “end”. For this Kubernetes has many abilities to allow extending the Kubernetes API to for example add custom objects. Example: A “Project” object which causes a Namespace (logical name isolation in Kubernetes) and, e.g., create Network Security Policies, for network side protection, automatically through an operator (pattern)*.
*Operator pattern = A pattern of watching for objects and / or object changes in the Kubernetes API and then reacting to those creations / changes (e.g., creating other objects).
You want to use Storage in Kubernetes?
No problem, Kubernetes allows you to specify claims for storage volumes and depending on if your storage system / software supports it dynamically provision these “claims for storage” for you.
Meaning that an application create a PersistentVolumeClaim requesting 50 Gigabytes of storage. Kubernetes and / or the storage system / software will then take care of creating the actual volume / disk and to not lose track of it, create a PersistentVolume in Kubernetes again (“Mapping” between Kubernetes and the Storage).
This allows for simple use of storage depending on if your storage system / software supports it.
NOTE
Container Storage Interface (CSI) plays an important role now and in the future. CSI is a set of interfaces which a storage system / software can implement so that Kubernetes and other systems can easily request storage.
“To mention it already there is a new interface for requesting / ‘managing’ storage, which is named Container Storage Interface (CSI). The goal of CSI is to have an unified interface through which anyone can request storage. Mounting of the requested storage is done by the storage dependent CSI driver then.”
And there are even more features!
- Horizontal Autoscaling for applications
- Loadbalancing for Level 4 and 7 Services.
- Level 7 Services are balanced using a Ingress Controller, which is not part of Kubernetes by default.
- Utilizing existing Storage for your applications (e.g., Ceph, NFS).
- Framework - Kubernetes API is easily extensible, examples for applications helping you with Kubernetes are:
- Istio - “Connect, secure, control, and observe services”.
- Vitess - “Vitess is a database clustering system for horizontal scaling of MySQL”.
- Prometheus Operator - “Prometheus Operator creates / configures/manages Prometheus clusters atop Kubernetes”.
- And more features already there and to come..
The GitHub kubernetes / enhancements repository is the place for enchancement tracking and backlog for Kubernetes. I suggest to check it out to see what else is on the “roadmap”.

Kubernetes - 'It's dangerous to go alone' *Zelda Meme intensifies*
Use Case Examples
Web applications
The ease of Ingress objects in Kubernetes, allows for simple exposition of HTTP based applications.
Example Ingres Object:
apiVersion: extensions/v1beta1
kind: Ingress
metadata:
  name: my-web-app
spec:
  # tls: Also possible with ease
  rules:
  - host: example.com
    http:
      paths:
      - path: /
        backend:
          serviceName: my-web-app
          servicePort: 8080
NOTE
We will get back to
Ingressobjects later on in the training, but for now we have to begin at the very basics.
The example Ingress object causes the “application” my-web-app to be available reachable when accessing example.com.
You could even have different paths for different application in the same or other objects, making it easy to “combine” multiple (micro-)services.
Having more insight and control of incoming traffic can be done as shown in the next use case example.
Service Mesh (Istio, Linkerd, and others)
Service Meshes allow you to gain more insight into the flow of traffic to your application. Not only can you gain more insight, but you can also control the traffic that with, e.g., Circuit Breaker Pattern and more possibilites.
And more …
There are many more use cases you can cover using Kubernetes or even containers in general.
To get some examples / case studies of companies moving / having moved to Kubernetes, checkout the Kubernetes - Case Studies page.
From docker-compose to Kubernetes?
There are tools to translate docker-compose files to Kubernetes “format” (kompose), but I would not recommend them for two simple reasons:
- To learn what objects are necessary and needed behind an application in Kubernetes, it is better to, e.g., have a Hackathon where everyone is playing around with the application to get it running on Kubernetes. => Learn effect!
- Additionally as there are some features which Docker doesn’t have, getting to know them through such a Hackathon makes for a good team building either way :-)
- Besides in the end you simply need to know the (basic) objects of Kubernetes to run, scale and keep your application running.
- The results are “basic” and still require manual improvements (e.g., health probes / checks, persistent storage, and more) to be made that the applications can / will run smoothly in Kubernetes with everything Kubernetes has to offer.
So please take yourself the time to play around with the available Kubernetes objects and features. This should give you an overview of what is available and optimal for your application(s) when you think / want to move them to Kubernetes.
Taking yourself time for looking into Kubernetes and other solutions will allow you to make a good decision, instead of using a butcher knife in an operation where a scalpel would have gotten the job done perfectly fine.
Prepare for the Kubernetes madness
Connect to the first training VM using SSH and follow the sections ahead.
Kubernetes System Requirements
The following are the system requirements for a Kubernetes node which will or has been setup with kubeadm:
- 2 or more CPU cores
- 2 or more Gigabytes of memory
- No MAC nor IP address duplication for the servers used.
- For later on, make sure you don’t use IP ranges already used in your company / organisation.
For the full list of requirements, see Kubernetes - Install kubeadm documentation “Before you begin” section.
Clone the workshop repo
Clone the repository, which contains the example and task files, from GitHub https://github.com/galexrt/workshop-container-docker-kubernetes.git. It’ll provide all files and tasks used in the Workshop.
$ git clone https://github.com/galexrt/workshop-container-docker-kubernetes.git
Cloning into 'workshop-container-docker-kubernetes'...
remote: Enumerating objects: 30, done.
remote: Counting objects: 100% (30/30), done.
remote: Compressing objects: 100% (23/23), done.
remote: Total 30 (delta 3), reused 30 (delta 3), pack-reused 0
Unpacking objects: 100% (30/30), done.
Now you are ready to run your first Pods in Kubernetes!
Kubernetes: First Steps
Hello World!
Kubernetes has something similar to docker run, kubectl run. We will use kubectl run for the first example to get started but to already say it, kubectl run isn’t really used in the end to, e.g., deploy applications.
$ kubectl run -it --image=hello-world --restart=Never hello-world

Hello from Docker!
This message shows that your installation appears to be working correctly.

To generate this message, Docker took the following steps:
 1. The Docker client contacted the Docker daemon.
 2. The Docker daemon pulled the "hello-world" image from the Docker Hub.
    (amd64)
 3. The Docker daemon created a new container from that image which runs the
    executable that produces the output you are currently reading.
 4. The Docker daemon streamed that output to the Docker client, which sent it
    to your terminal.

To try something more ambitious, you can run an Ubuntu container with:
 $ docker run -it ubuntu bash

Share images, automate workflows, and more with a free Docker ID:
 https://hub.docker.com/

For more examples and ideas, visit:
 https://docs.docker.com/get-started/
Cool, isn’t it? It’s a bit like Docker, but so different in the end.
What the kubectl run command has just done is create a “Pod” object in Kubernetes which is similar to a “container” in the Docker world, more on that later.
Kubernetes uses YAML (/ JSON for the hardcore people) to define objects in its API. The mentioned “Pod” object is one of them.
NOTE
Speaking of YAML:
- To separate documents / objects, you put
---in between them. - Don’t use tabs, only use spaces in YAML files, or your gonna have a bad time.
- You can use, e.g., Online YAML Parser to validate your YAML files online or also locally through addons / extensions in your editor.
There are different types of objects in Kubernetes, as an example with the above kubectl run command we created a Pod object with the name of hello-world.
Let’s look at the “Pod” object
(No we are not talking about the band P.O.D.)
To look at the Pod we just created using kubectl run, we are going to use kubectl get now:
$ kubectl get pod hello-world
NAME          READY   STATUS      RESTARTS   AGE
hello-world   0/1     Completed   0          12s
This only got us the Pod in a “list” format. Omitting the hello-world (object name) would cause all Pod objects in the current Namespace to be listed.
A Namespace is a logical naming space separation for objects, meaning that it is possible to have multiple hello-world Pod objects in different namespaces at the same time.
This is one of the “special” points of Kubernetes, being able to separate object (/ applications) by name already.
To get the YAML / JSON contents of this Pod object, we add the --output=FORMAT (short: -o FORMAT) flag to the kubectl get command:
$ kubectl get pod hello-world --output yaml
apiVersion: v1
kind: Pod
metadata:
  annotations:
    cni.projectcalico.org/podIP: 100.67.92.19/32
  creationTimestamp: "2019-05-04T18:02:30Z"
  labels:
    run: hello-world
  name: hello-world
  namespace: default
  resourceVersion: "11195745"
  selfLink: /api/v1/namespaces/default/pods/hello-world
  uid: c919ad65-6e96-11e9-a6f0-9600001d3faa
spec:
  containers:
  - image: hello-world
    imagePullPolicy: Always
    name: hello-world
    resources: {}
    stdin: true
    stdinOnce: true
    terminationMessagePath: /dev/termination-log
    terminationMessagePolicy: File
    tty: true
    volumeMounts:
    - mountPath: /var/run/secrets/kubernetes.io/serviceaccount
      name: default-token-lb5tz
      readOnly: true
  dnsPolicy: ClusterFirst
  enableServiceLinks: true
  nodeName: k8s02-node-mvljd2v2nje-htz-deu-fsn1dc1.clster.systems
  priority: 0
  restartPolicy: Never
  schedulerName: default-scheduler
  securityContext: {}
  serviceAccount: default
  serviceAccountName: default
  terminationGracePeriodSeconds: 30
  tolerations:
  - effect: NoExecute
    key: node.kubernetes.io/not-ready
    operator: Exists
    tolerationSeconds: 300
  - effect: NoExecute
    key: node.kubernetes.io/unreachable
    operator: Exists
    tolerationSeconds: 300
  volumes:
  - name: default-token-lb5tz
    secret:
      defaultMode: 420
      secretName: default-token-lb5tz
status:
  conditions:
  - lastProbeTime: null
    lastTransitionTime: "2019-05-04T18:02:31Z"
    reason: PodCompleted
    status: "True"
    type: Initialized
  - lastProbeTime: null
    lastTransitionTime: "2019-05-04T18:02:35Z"
    reason: PodCompleted
    status: "False"
    type: Ready
  - lastProbeTime: null
    lastTransitionTime: "2019-05-04T18:02:35Z"
    reason: PodCompleted
    status: "False"
    type: ContainersReady
  - lastProbeTime: null
    lastTransitionTime: "2019-05-04T18:02:30Z"
    status: "True"
    type: PodScheduled
  containerStatuses:
  - containerID: containerd://f5cea87d6ed60944a564c28ca9f1ee96eda262f3d0b99587fa798c0ea1a650ed
    image: docker.io/library/hello-world:latest
    imageID: docker.io/library/hello-world@sha256:92695bc579f31df7a63da6922075d0666e565ceccad16b59c3374d2cf4e8e50e
    lastState: {}
    name: hello-world
    ready: false
    restartCount: 0
    state:
      terminated:
        containerID: containerd://f5cea87d6ed60944a564c28ca9f1ee96eda262f3d0b99587fa798c0ea1a650ed
        exitCode: 0
        finishedAt: "2019-05-04T18:02:34Z"
        reason: Completed
        startedAt: "2019-05-04T18:02:34Z"
  hostIP: [IP OF NODE REMOVED]
  phase: Succeeded
  podIP: 100.67.92.19
  qosClass: BestEffort
  startTime: "2019-05-04T18:02:31Z"
Don’t worry be happy the kubectl get output shows “every field” of this Pod object named hello-world (e.g., the status part / structure is generated by Kubernetes). You don’t need to provide all of them, only a (small) handful of the specifications.
A Pod is Kubernetes’ logical unit of workload, which consists of one or more containers which will all run in the same Node. All containers of a Pod share the same process and network context, and volumes (for data) between each other. Besides that a Pod has one IP address (+ localhost).
NOTE
If at any point you need help with Kubernetes object and / or
kubectlcli, please look into the Kubessar and / orkubectl- Our tool tocatchdeploy them all sections for information.
Pod - “No, not the band”
TASK:
kubernetes101
A simple nginx Pod object which will run a nginx container with the port 80 exposed inside the cluster looks like this (file nginx.yaml):
apiVersion: v1
kind: Pod
metadata:
  labels:
    app.kubernetes.io/name: nginx
  name: nginx
spec:
  containers:
  - image: nginx:1.15.12
    name: nginx
    env:
    - name: MY_ENV_VAR
      value: "Hello World!"
    ports:
    - containerPort: 80
      name: http
      protocol: TCP
Splitting the YAML into multiple parts to get a better grasp of what what means and which parts are “more” important.
An object no matter if it is a Kubernetes “in-built” or custom defined ones, will always consist of:
apiVersion: The (API) version of the object API to use.kind: “Type” of the object (e.g.,Pod,Namespace,Deployment).metadata: Basic information about an object, see next section,metadata.spec: Specifications for thePodobject.
There are more parts to a Pod object, but there are .
metadata
annotations: Key / Value pairs with information you do not need to select the objects by; Kubernetes - Annotations.labels: Labels of the object (key-value pairs). You can select objects based on labels (label selector); Kubernetes - Labels.name: Name of the object; Kubernetes - Names.namespace: This is only available when the object (API) is namespaced, allows to separate objects name-wise from each other; Kubernetes - Namespaces.
spec and others
(“others” = e.g., status)
This is the part which is always different per object and also potentially different per API version (apiVersion).
To know how each object in itself looks, please refer to the Kubernetes API reference for your Kubernetes cluster version (kubectl version): Kubernetes - Reference.
WDWD
spec.containers: List of containers to run in this Pod (more is not good, just create more Pods).image: Container image name / URL to run.name: Name of the container.env: Environment variables to add to the container.name: Name of the environment variable.value: Value of the environment variable. In an upcoming section we will look into dynamically using so calledConfigMaps andSecretsfor the configuration of your application.
ports: List of ports to “open” on the container.containerPort: Port on the container.name: “Human” name for the port.protocol: Protocol of the port, eitherTCPorUDP(defaultTCP).
That is a very basic Pod YAML structure, you can do much more as shown in the Kubernetes features section.
Namespaces
Namespaces in Kubernetes are exactly what the name implies, a space for names. Meaning that most objects in Kubernetes are namespaced.
Meaning that you can have a Pod object in Namespace abc and xyz with the same name.
Same goes for other objects, besides Pods, in Kubernetes, e.g., Deployment, Service, ReplicaSet, PersistentVolumeClaim, Secret, ConfigMap and many more.
NOTE
In Kubernetes there are no sub-Namespaces and also no sub-sub-Namespaces, sub-sub-sub-sub-Namespaces. Keep that in mind when naming them. I would recommend you to create a Namespace naming schema in some way for your Kubernetes cluster(s) in your company / organisation.
Let’s run WordPress on Kubernetes
WordPress Logo
What do we need for WordPress? Some storage for our attachments and a MySQL database. Nothing easier than that.
Before jumping further into the magical world of Kubernetes objects in form of YAML structures, let’s look at the “requirements” for WordPress (no redundancy yet) from a Kubernetes feature perspective.
WDWD
- We want to run a MySQL database
Podand WordPressPod.- We want to keep it running no matter what is going in the Kubernetes cluster (e.g., a node failure).
- =>
Deployment- Keeps X instances /replicasof a definedPodtemplate running. ThePodtemplate contains the same information as seen in the above Let’s look at the “Pod” section.
- MySQL should be reachable under the same name and / or IP address at all times.
- =>
Service- Causes an IP to be “allocated” and made reachable from within the Kubernetes cluster (Pods), and DNS records.
- =>
- WordPress should be exposed to the “public”.
We now know the Kubernetes objects we need to get a MySQL database and the WordPress running.
Let’s begin ticking off each part of the list! Starting with the MySQL Database.
Running the MySQL Database
A Pod in itself does not have any means of being “recreated” when it has been deleted.
That is where objects like Deployments (+ ReplicaSet) and StatefulSet come into play.
We start with a Deployment object which we can tell to always keep X instances (replicas) of our defined “Pod template”.
NOTE
For now we leave high availability of the MySQL database Pod out of the picture.
The “Pod template” is basically the “same” as a Pod, but with a few fields / structures left out. These left out fields / structures are “templated” by the Deployment object automatically.
When you create a Deployment, a so called ReplicaSet object is created automatically. The ReplicaSet created is the current state of the Deployment. Means that if the Deployment is updated (e.g., a new image is used for a container in the Pod template), a new ReplicaSet is created (there is a limit of 10 by default, they are deleted automatically).
If you delete a Pod that is part of the Deployment, the ReplicaSet “magic” in the background create a new Pod to fullfill the wanted replicas count.
TASK:
kubernetes202-mysql.yaml
apiVersion: apps/v1
kind: Deployment
metadata:
  name: mysql
  labels:
    app.kubernetes.io/name: mysql
    app.kubernetes.io/part-of: wordpress
spec:
  selector:
    matchLabels:
      app.kubernetes.io/name: mysql
      app.kubernetes.io/part-of: wordpress
  template:
    metadata:
      labels:
        app.kubernetes.io/name: mysql
        app.kubernetes.io/part-of: wordpress
    spec:
      containers:
      - image: mysql:5.6
        name: mysql
        env:
        - name: MYSQL_ROOT_PASSWORD
          value: changeme
        ports:
        - containerPort: 3306
          name: mysql
          protocol: TCP
As previosuly talked about apiVersion, kind and metadata are for identifying the object.
The spec structure contains the following info:
WDWD
selector: The selector to “find” the Pods spawned from theDeployment(through theReplicaSet; Kubernetes - Deployments - Selector Information).template: This is the “Pod”templatestructure previosuly written about, see examplePodfor how aPodobject looks.
All these fields / structures are important for the Deployment, but there are tools to have this and the other objects tempalted to reduce Time-to-Deploy (TtD).
NOTE
Don’t run a
kubectlcommand on themysql.yamlfile yet.
Configuring the MySQL server
In the above Pod - “No, not the band” section, a Pod object was shown with a section called env::
[...]
spec:
  containers:
[...]
    env:
    - name: MY_ENV_VAR
      value: "Hello World!"
[...]
In the WDWD section, it was explained that those variables are added to the container as environment variables, so your application can consume them.
To have a better separation between the actual definition of your Pod’s containers, we are looking into ConfigMaps and Secrets now.
ConfigMaps and Secrets are basically objects to have key-value pairs of “data” in them. They can be used to provide applications with configuration / secrets.
An important part to mention is that if you edit a ConfigMap and / or Secret object and have a key set as an environment variable for a Pod, the environment variable is never updated due to limitations in environment variable handling for processes.
On the other hand if you have mounted a ConfigMap and / or Secret object, the mount will be updated (at latest after 1 minute, configurable) in the Pods, this means that you can “inotify” on your config file(s) and then reload dynamically.
ConfigMap
This is an example of a ConfigMap. It has two keys defined in it, one named MY_API_SERVICE_ADDRESS with a single line string value and a second one config.yaml which is a multi-line string.
Especially for the second key, it would make sense to mount this key as a file. This is possible by specifying the list of keys (items) in the volumeMounts list. Meaning that if you added such an entry the config.yaml would be available inside the Pod’s container for your application to read from, like anyother file (ConfigMap and Secret keys mounted are read-only!).
The volumeMounts list, is the list of given volumes to mount to a container in a Pod, more on that in an upcoming section.
TASK:
kubernetes101-configmap.yaml
apiVersion: v1
data:
  # You can have multiple key-value pairs in one `ConfigMap`
  MY_API_SERVICE_ADDRESS: https://my-api-service.example.com
  # You can specify which keys of a `ConfigMap` to mount in a Pod
  config.yaml: |
    database:
      host: broker
      port: 5234
      username: root
      # Will be read from the environment by the application reading the `config.yaml`
      password: ${DB_USER}
kind: ConfigMap
metadata:
  labels:
    app.kubernetes.io/name: my-app
  name: my-config
If you want to, you can copy the contents of the ConfigMap example and run kubectl create -f FILE_NAME on it. After that you can use kubectl get configmap NAME -o yaml to look at it in the Kubernetes API.
Secret
A Secret is only base64 encoded, so it is not so secret as the name implies. You can however encrypt the data inside the “brain of the Kubernetes cluster”.
TASK:
kubernetes101-secret.yaml
The example below has a single key-value pair, named DB_PASSWORD with the base64 encoded value kubernetesiscool:
apiVersion: v1
data:
  # `Secret` values are base64 encoded right now.
  DB_PASSWORD: a3ViZXJuZXRlc2lzY29vbA==
kind: Secret
metadata:
  labels:
    app.kubernetes.io/name: my-app
  name: my-app
type: Opaque
You can as for a ConfigMap mount specify which keys to mount in a Pod’s containers, which will be covered now.
If you want to, you can copy the contents of the Secret example and run kubectl create -f FILE_NAME on it. After that you can use kubectl get secret NAME -o yaml to look at it in the Kubernetes API.
Moving the MySQL configuration to a ConfigMap and Secret
NOTE
Mounting a
ConfigMapandSecretwill be a topic for later on. For this section we’ll just use values from aConfigMapandSecretas environment variables of the example MySQLDeploymentobject here.
apiVersion: v1
data:
  MYSQL_ALLOW_EMPTY_PASSWORD: "off"
kind: ConfigMap
metadata:
  labels:
    app.kubernetes.io/name: mysql
    app.kubernetes.io/part-of: wordpress
  name: mysql-config
---
apiVersion: v1
data:
  MYSQL_ROOT_PASSWORD: Y2hhbmdlbWU=
kind: Secret
metadata:
  labels:
    app.kubernetes.io/name: mysql
    app.kubernetes.io/part-of: wordpress
  name: mysql-secret
type: Opaque
---
apiVersion: apps/v1
kind: Deployment
metadata:
  name: mysql
  labels:
    app.kubernetes.io/name: mysql
    app.kubernetes.io/part-of: wordpress
[...]
spec:
[...]
  selector:
    matchLabels:
      app.kubernetes.io/name: mysql
      app.kubernetes.io/part-of: wordpress
  template:
[...]
    spec:
      containers:
      - image: mysql:5.6
        name: mysql
        # Two ways possible:
        ## 1. If we want to mount specific keys from the `Secret` or `ConfigMap`:
        env:
        ### For `Secret`
        - name: MYSQL_ROOT_PASSWORD
          valueFrom:
            secretKeyRef:
              name: mysql-secret
              key: MYSQL_ROOT_PASSWORD
        ### For `ConfigMap`
        - name: MYSQL_ALLOW_EMPTY_PASSWORD
          valueFrom:
            configMapKeyRef:
              name: mysql-config
              key: MYSQL_ALLOW_EMPTY_PASSWORD
        ## 2. If we want to add all keys (which are all uppercase) of a `Secret` or `ConfigMap` as environment variables we can use:
        envFrom:
        ### For `Secret`
        - secretRef:
            name: mysql-secret
        ### For `ConfigMap`
        - configMapRef:
            name: mysql-config
[...]
For the first method, this would take the given key(s) from the ConfigMap / Secret by name and add that value under the environment variable name to the container of the Pod.
The envFrom method, will do the same but simply add all keys (which are all uppercase) to the container of the Pod as environment variables.
As fine-grained that you can specify which keys of a ConfigMap and Secret to be available as environment variables, is also possible for mounting keys into a Pod. They will be mounted as files directly.
When mounted and the ConfigMap and / or Secret is updated, the content of the mounted keys is also updated (will take at maximum one minute after the change to have propagated to each node).
Now that we know about configuration of Pods, let’s move on to making the MySQL server available as a “Service” in the Kubernetes cluster.
Making the MySQL server available as a “Service”
In Kubernetes there are Service objects, which allow to select one or more Pods based on labels and “group” them behind “one” cluster wide reachable IP and a DNS record for it.
Meaning that if we were to run a web application through a Deployment, we would create a Service selecting the application Pods based on the labels. That would allow any application in the cluster (also an Ingress controller), to access the web application through one IP address / DNS name.
Without Services in Kubernetes you would need to talk to a Pod IP address directly, meaning that if the Pod is deleted and a new one is started that the IP address can be different. Having such one IP address and DNS name, allows for DNS based service discovery and dynamically extending an application behind that Service without “anyone” noticing.
TASK:
kubernetes202-mysql.yaml
A Service object looks like that:
apiVersion: v1
kind: Service
metadata:
  name: mysql
  labels:
    app.kubernetes.io/name: mysql
    app.kubernetes.io/part-of: wordpress
spec:
  ports:
    - name: mysql
      port: 3306
      protocol: TCP
  selector:
    app.kubernetes.io/name: mysql
    app.kubernetes.io/part-of: wordpress
  type: ClusterIP
WDWD
Focusing on the
specpart here.
ports: List of ports.name: Name of the port.port: Port on theServicethat should be “exposed” inside the Kubernetes cluster.protocol:TCPorUDP(there are other protocols but “only” for othertypes ofService).targetPort: Optional. Allows to use a different port on the Pod side (e.g.,port: 80andtargetPort: 8080, will cause traffic on the Service on port80to be “redirected” to port8080on the Pods).
selector: A label selector . With that you can select Pods based on their labels for theService.type: Optional.ClusterIP(default), what that means will be looked into detail in a second.
Now we look into the last mentioned field type. There are multiple types of the Service`, which allow for different “publishing” / exposition of one or more Pods inside and / or outside of the Kubernetes cluster.
We’ll scratch a network topic already with that but the actual in-deep look will be done later on.
NOTE
For most software defined networks that can be used with Kubernetes a Service IP is not pingable! Only the ports in the
Serviceobjects are “connected” to thePodsthat theServiceis selecting.
ClusterIP
“Exposes the service on a cluster-internal IP. Choosing this value makes the service only reachable from within the cluster. This is the default ServiceType.” – Taken from Kubernetes - Services: ClusterIP
This is the most commonly used Service type. A cluster-interally reachable IP address and a DNS name, for services inside the Kubernetes cluster to use.
NodePort
“Exposes the service on each Node’s IP at a static port (the
NodePort). AClusterIPservice, to which theNodePortservice will route, is automatically created. You’ll be able to contact theNodePortservice, from outside the cluster, by requesting<NodeIP>:<NodePort>.” – Taken from Kubernetes - Services: NodePort
Is a ClusterIP service, so an IP address and DNS name is allocated, but for this ClusterIP a port is opened on all Nodes of the cluster (changeable, trafficPolicy). The port is from the so called NodePort Port range.
LoadBalancer
“Exposes the service externally using a cloud provider’s load balancer.
NodePortandClusterIPservices, to which the external load balancer will route, are automatically created.” – Taken from Kubernetes - Services: LoadBalancer
Is a NodePort service which has the NodePort(s) exposed through a Cloud load balancer. This is possible for certain cloud providers / environments (e.g., AWS, Google Cloud, OpenStack, and more).
ExternalName
“Maps the service to the contents of the
externalNamefield (e.g.foo.bar.example.com), by returning aCNAMErecord with its value. No proxying of any kind is set up. This requires version 1.7 or higher ofkube-dns.” – Taken from Kubernetes - Services: ExternalName
A CNAMEfor an external name (no proxying).
Service DNS Name Naming
Let’s say we have a Service named mysql in the default namespace. This is the cluster-internal DNS name schema:
NAME.NAMESPACE.svc.cluster.local
Which means for our Service this is its full name:
wordpress.default.svc.cluster.local
The cluster.local is a customizable cluster-wide DNS prefix. I would recommend you to leave it as cluster.local.
Please note that for the DNS resolution search parameters are set in the resolv.conf mounted inside the Pod’s containers.
Meaning that if a Pod in the namespace default wants to access the mysql Service, it can just use mysql for the DNS name.
But a Pod from the namespace workshop, must use at least the following DNS name mysql.default.svc to access the mysql Service in the default namespace.
Storage for our precious MySQL database

LOTR Gollum - 'My precious data'
(Taken from TechCrunch | Our Precious, owned by J.R.R. Tolkien)
Right now if the MySQL database Pod is deleted all data in it would be lost.
We don’t want that to happen, so we are going to put storage in the Pod. This is done using PersistentVolumeClaims. A PersistentVolumeClaim is a way to “request” / “claim” X amount of storage for an application.
This is mostly used with dynamically provisioned storage, where the Kubernetes storage in some way is talking to a storage software / system to create PersistentVolumes on-demand when the user needs them.
TASK:
kubernetes202-mysql.yaml
A PersistentVolumeClaim looks like this:
apiVersion: v1
kind: PersistentVolumeClaim
metadata:
  name: mysql
  labels:
    app.kubernetes.io/name: mysql
    app.kubernetes.io/part-of: wordpress
spec:
  storageClassName: rook-ceph-block
  accessModes:
  - ReadWriteOnce
  resources:
    requests:
      storage: 5Gi
I hope it is looking pretty straight forward to you.
NOTE
In the provided cluster there is a Rook Ceph cluster running which is running Ceph in the Kubernetes cluster and dynamically provides storage for the Kubernetes cluster. Keep that in mind when trying in other Kubernetes cluster, besides the provided ones.
WDWD
storageClassName: There areStorageClasses in Kubernetes which can hold differentparameterswhich are given to the dynamic storage volume provisioner.accessModes: There are three different access modes for volumes.ReadWriteOnce,ReadOnlyManyandReadWriteMany, these boil down to “mount once”, “many mounts for read” and “many mounts for write " see Kubernetes - Persistent Volumes - Access Modes.resources: Resource spec.requestsstorage: The (minimum) size of the storage for thePersistentVolumeto create. Can be just a number (Mi),Mi,Gi,Tiand so on.
For the Pod from the Deployment to use this PersistentVolumeClaim is to add an entry to the volumes list of the Pod, and for the container(s) to consume it then an entry to the volumeMounts list.
The names probably make it clear that the volumes list the actual list of volumes that will be added to the Pod and the volumeMounts are then the points where the volumes are mounted inside the container(s) of the Pod.
Save the PersistentVolumeClaim as mysql-pvc.yaml and run kubectl create -f mysql-pvc.yaml on the file (from the master server).
The kubectl create should respond back with a message that a PersistentVolumeClaim has been created (no errors).
Now that we have a PersistentVolumeClaim “claiming” storage for the MySQL Pod, we just need to add that to the Deployment object that it will mount and use the storage.
TASK:
kubernetes202-mysql-with-storage.yamlNOTE
Have you previoulsy ran
kubectl create/kubectl applyonmysql.yaml? Please runkubectl delete -f mysql.yamlto remove the objects first before continuing.
MySQL Deployment example with PersistentVolumeClaim for the storage:
apiVersion: apps/v1
kind: Deployment
metadata:
  name: mysql
  labels:
    app.kubernetes.io/name: mysql
    app.kubernetes.io/part-of: wordpress
spec:
  selector:
    matchLabels:
      app.kubernetes.io/name: mysql
      app.kubernetes.io/part-of: wordpress
  strategy:
    type: Recreate
  template:
    metadata:
      labels:
        app.kubernetes.io/name: mysql
        app.kubernetes.io/part-of: wordpress
    spec:
      containers:
      - image: mysql:5.6
        name: mysql
        env:
        - name: MYSQL_ROOT_PASSWORD
          value: changeme
        ports:
        - containerPort: 3306
          name: mysql
        volumeMounts:
        - name: mysql
          mountPath: /var/lib/mysql
      volumes:
      - name: mysql
        persistentVolumeClaim:
          claimName: mysql
WDWD
strategy: Strategy to update Pods that are spawned through theDeployment.type: Strategy name.Recreatewill delete an old Pod first and create a new one afterwards.
volumeMounts: List of mounts for thevolumeslist.name: Name of the volume.mountPath: The path inside the container to attach the volume to.
volumes: List of volumes for the Pod’s container.name: Name of the volume, will be used in thevolumeMountslist for matching to a volume.persistentVolumeClaim: Volume information for aPersistentVolumeClaim.claimName: Name of an existingPersistentVolumeClaimto mount.
- Besides mounting storage through
PersistentVolumeClaims, there are other storage options available for your applications (emptyDir,ConfigMap,Secrets, etc).
Now that our database will not lose its data, we can run kubectl create -f mysql-with-storage.yaml in the task directory, this will create a MySQL Deployment which mounts the PersistentVolumeClaim previosuly created to the mysql container at /var/lib/mysql.
After the kubectl create run, we can use kubectl get to check if our Deployment and PersistentVolumeClaim have been created:
$ kubectl get deployment,pod,persistentvolumeclaim
NAME                          READY   UP-TO-DATE   AVAILABLE   AGE
deployment.extensions/mysql   1/1     1            1           86s

NAME                         READY   STATUS      RESTARTS   AGE
pod/hello-world              0/1     Completed   0          26h
pod/mysql-5fc68fb84c-bssg4   1/1     Running     0          86s

NAME                          STATUS   VOLUME                                     CAPACITY   ACCESS MODES   STORAGECLASS      AGE
persistentvolumeclaim/mysql   Bound    pvc-3ede7af3-6f74-11e9-a6f0-9600001d3faa   5Gi        RWO            rook-ceph-block   86s
(The name in the VOLUME column at the end will be different per cluster!)
Isn’t that cool? We now have a MySQL Pod running.
Before we make sure the database server is working, let’s quickly close the basic storage topic, by looking at the other important volume types for applications in Kubernetes.
Volume Types (emptyDir, ConfigMap, Secrets, etc)
Besides previosuly talked about ConfigMaps and Secrets which can used for environment variable and also to mount as volumes, there are some important other volume types like emptyDir and hostPath.
emptyDir
When a Pod is created and scheduled to a node, a empty directory is created and mounted inside the Pod.
This directory is only persistent till the Pod has been deleted, if a Pod of, e.g., the same Deployment is put on the same node, the new Pod gets its own new empty directory and not a used one.
hostPath
A Pod can also mount storage from the host into the container(s). Unless you have a very good reason, restrict usage of hostPath and use Kubernetes - Local Persistent Storage.
NOTE
There can be good reason to mount a host path into a Pod’s container(s), but for normal users that can lead to nodes running full because there is no data management behind
hostPath“volumes”.
Make sure the database server is working
Maybe you know about docker exec, which can be used to run a command and / or shell inside a running container.
kubectl exec does the same but for Pods. If a Pod has more than one container, it will “cmplain” to you and tell you the list of containers, which you can specify using the -c CONTAINER_NAME flag.
Adapt the following command to your mysql Pod name with the command bash:
kubectl exec -it POD_NAME -- COMMAND ARGS
WDWD
-it-istands for interactive (attach stdin and stdout, stderr from thekubectl).twill cause a TTY to be attached, a TTY is needed for applications likevim,emacsand so on.POD_NAME- Name of the Pod to exec into.COMMAND- Command to execute inside the Pod’s container.ARGS- Optional. Arguments passed to theCOMMANDgiven.
The result can look like this:
$ kubectl exec -it mysql-5fc68fb84c-bssg4 -- bash
root@mysql-5fc68fb84c-bssg4:/#
This has now opened an interactive bash shell inside the MySQL Pod.
Let’s use mysql command to connect to the database server:
root@mysql-5fc68fb84c-bssg4:/# mysql -u root -p$MYSQL_ROOT_PASSWORD
Warning: Using a password on the command line interface can be insecure.
Welcome to the MySQL monitor.  Commands end with ; or \g.
Your MySQL connection id is 1
Server version: 5.6.44 MySQL Community Server (GPL)

Copyright (c) 2000, 2019, Oracle and/or its affiliates. All rights reserved.

Oracle is a registered trademark of Oracle Corporation and/or its
affiliates. Other names may be trademarks of their respective
owners.

Type 'help;' or '\h' for help. Type '\c' to clear the current input statement.

mysql> SHOW DATABASES;
+--------------------+
| Database           |
+--------------------+
| information_schema |
| mysql              |
| performance_schema |
+--------------------+
3 rows in set (0.00 sec)

mysql> quit
Bye
root@mysql-5fc68fb84c-bssg4:/# exit
Awesome! Our MySQL server Pod is running as should.
We took the “extra” steps to attach storage to the MySQL Deployment so let’s test what happens if the MySQL Pod is deleted.
Test resilience of MySQL server Deployment
Go ahead and delete the MySQL Pod in the default Namespace (no need to use --namespace flag though as it is the default).
To get the current Pods, run:
$ kubectl get pod
NAME                     READY   STATUS      RESTARTS   AGE
hello-world              0/1     Completed   0          26h
mysql-5fc68fb84c-bssg4   1/1     Running     0          11m
Pod with name mysql-5fc68fb84c-bssg4 is our target, so run kubectl delete pod mysql-5fc68fb84c-bssg4.
Checking the current Pods now, we should see a new Pod running:
$ kubectl get pod
NAME                     READY   STATUS      RESTARTS   AGE
hello-world              0/1     Completed   0          26h
mysql-5fc68fb84c-crm86   0/1     Running     0          16s
This will mean for our WordPress which we are going to create in the next section, that if the MySQL Pod is down / deleted, a new one will spawn up with the same data so that WordPress can continue working.
What do we have now?
We now have a Deployment which keep one Pod of MySQL running running. The Deployment has the configuration in it for the MySQL Pod it is spawning.
But we have not specified a store for the MySQL data yet, we will do that as the next step.
Besides the Deployment we have a Service, which makes the MySQL reachable under a “static” cluster-internal IP address and DNS name for the Service.
Meaning the WordPress can easily access the MySQL database server through the DNS name of the Service.
So let’s get right onto it and run WordPress.
Running WordPress
TASK:
kubernetes202-wordpress.yaml
wordpress Deployment, Service and PersistentVolumeClaim YAML:
apiVersion: apps/v1
kind: Deployment
metadata:
  name: wordpress
  labels:
    app.kubernetes.io/name: wordpress
    app.kubernetes.io/part-of: wordpress
spec:
  selector:
    matchLabels:
      app.kubernetes.io/name: wordpress
      app.kubernetes.io/part-of: wordpress
  template:
    metadata:
      labels:
        app.kubernetes.io/name: wordpress
        app.kubernetes.io/part-of: wordpress
    spec:
      containers:
      - image: wordpress:5.1.1-php7.1-apache
        name: wordpress
        env:
        - name: WORDPRESS_DB_HOST
          value: mysql
        - name: WORDPRESS_DB_PASSWORD
          value: changeme
        ports:
        - containerPort: 80
          name: wordpress
---
apiVersion: v1
kind: Service
metadata:
  name: wordpress
  labels:
    app.kubernetes.io/name: wordpress
    app.kubernetes.io/part-of: wordpress
spec:
  ports:
    - name: http
      port: 80
      protocol: TCP
  selector:
    app.kubernetes.io/name: wordpress
    app.kubernetes.io/part-of: wordpress
  type: NodePort
---
apiVersion: v1
kind: PersistentVolumeClaim
metadata:
  labels:
    app.kubernetes.io/name: wordpress
    app.kubernetes.io/part-of: wordpress
  name: wordpress
spec:
  storageClassName: rook-ceph-block
  accessModes:
  - ReadWriteOnce
  resources:
    requests:
      storage: 5Gi
Go to the task directory and run kubectl create -f wordpress.yaml.
This will create the objects defined in the YAML.
Check on the newly created wordpress objects using kubectl get with a label selector:
$ kubectl get deployment,svc,persistentvolumeclaim,pod -l app.kubernetes.io/name=wordpress
NAME                              READY   UP-TO-DATE   AVAILABLE   AGE
deployment.extensions/wordpress   1/1     1            1           44s

NAME                TYPE       CLUSTER-IP      EXTERNAL-IP   PORT(S)        AGE
service/wordpress   NodePort   100.76.188.95   <none>        80:30142/TCP   44s

NAME                              STATUS   VOLUME                                     CAPACITY   ACCESS MODES   STORAGECLASS               AGE
persistentvolumeclaim/wordpress   Bound    pvc-8059dc54-6f77-11e9-a067-9600001d3fa9   5Gi        RWO            rook-ceph-block-repl-3-1   44s

NAME                             READY   STATUS    RESTARTS   AGE
pod/wordpress-56bdcbcb5b-jhpjw   1/1     Running   0          44s
The STATUS column for the pod/wordpress-... should be Running, if not please let me know and you can try to look into yourself using the kubectl describe KIND OBJECT_NAME which will be explained in the next section.
Having issues? kubectl describe is here for you
kubectl describe is a way to “describe” Pods in a human readable form. In this “description” the Events for Pods are shown. These Events can help you track down what the issue is with, e.g., a Pod not starting up.
Run kubectl describe on the Pod above and checkout the output:
$ kubectl describe pod wordpress-56bdcbcb5b-jhpjw
Name:               wordpress-56bdcbcb5b-jhpjw
Namespace:          default
Priority:           0
PriorityClassName:  <none>
Node:               k8s02-node-9one1voqljz-htz-deu-fsn1dc1.clster.systems/94.130.51.245
Start Time:         Sun, 05 May 2019 22:51:05 +0200
Labels:             app.kubernetes.io/name=wordpress
                    app.kubernetes.io/part-of=wordpress
                    pod-template-hash=56bdcbcb5b
Annotations:        cni.projectcalico.org/podIP: 100.67.207.68/32
Status:             Running
IP:                 100.67.207.68
Controlled By:      ReplicaSet/wordpress-56bdcbcb5b
Containers:
  wordpress:
    Container ID:   containerd://301ffa076b4151276e97e2c9df9f9e3788aa1cb6bfead00b70f84d04d78b4595
    Image:          wordpress:5.1.1-php7.1-apache
    Image ID:       docker.io/library/wordpress@sha256:ec14baae52d61e409ea4c2ccaf63401a660266977b0b6ec2dc81396f55f27f57
    Port:           80/TCP
    Host Port:      0/TCP
    State:          Running
      Started:      Sun, 05 May 2019 22:51:07 +0200
    Ready:          True
    Restart Count:  0
    Environment:
      WORDPRESS_DB_HOST:      mysql
      WORDPRESS_DB_PASSWORD:  changeme
    Mounts:
      /var/run/secrets/kubernetes.io/serviceaccount from default-token-lb5tz (ro)
Conditions:
  Type              Status
  Initialized       True
  Ready             True
  ContainersReady   True
  PodScheduled      True
Volumes:
  default-token-lb5tz:
    Type:        Secret (a volume populated by a Secret)
    SecretName:  default-token-lb5tz
    Optional:    false
QoS Class:       BestEffort
Node-Selectors:  <none>
Tolerations:     node.kubernetes.io/not-ready:NoExecute for 300s
                 node.kubernetes.io/unreachable:NoExecute for 300s
Events:
  Type    Reason     Age    From                                                            Message
  ----    ------     ----   ----                                                            -------
  Normal  Scheduled  4m16s  default-scheduler                                               Successfully assigned default/wordpress-56bdcbcb5b-jhpjw to k8s02-node-9one1voqljz-htz-deu-fsn1dc1.clster.systems
  Normal  Pulled     4m15s  kubelet, k8s02-node-9one1voqljz-htz-deu-fsn1dc1.clster.systems  Container image "wordpress:5.1.1-php7.1-apache" already present on machine
  Normal  Created    4m15s  kubelet, k8s02-node-9one1voqljz-htz-deu-fsn1dc1.clster.systems  Created container wordpress
  Normal  Started    4m14s  kubelet, k8s02-node-9one1voqljz-htz-deu-fsn1dc1.clster.systems  Started container wordpress
Instead of having to look through the massive YAML output of running kubectl get TYPE OBJECT_NAME -o yaml, kubectl describe outputs most information that is needed to look into an issue.
Be sure to use it if you should have issues and / or encounter weird behavior (e.g., no Pods starting for a Deployment (kubectl describe deployment OBJECT_NAME), etc).
Get creative with your Kubernetes cluster!
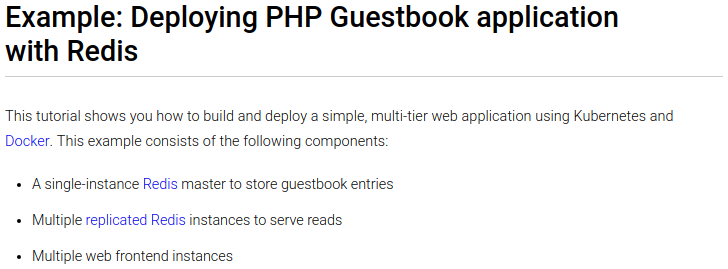
To further deepen the new knowledge we have made, let’s deploy an PHP Guestbook application that uses Redis.
For that please follow the instructions here: Example: Deploying PHP Guestbook application with Redis - Kubernetes documentation.
Kubernetes Guestbook Tutorial Content
If you have questions and / or issues with the instructions or questions about Kubernetes, please let me know / ask them now.
Already done with the PHP Guestbook application on Kubernetes?
You can look into the Kubernetes - Learn Kubernetes Basics page and go through the ^.+ Your App tutorials linked in the sidebar, for more tasks to deepen your knowledge, or take a break for a few minutes to relax your brain.
Summary
You have successfully learned about the basic objects and commands to deploy an application onto of Kubernetes as a container.
We will now move on the deploying your own Kubernetes cluster in the next section (and after the break).
Deploy your own Kubernetes cluster
Follow these simple steps to get a Kubernetes cluster up and running fast.
The recipe for a Kubernetes cluster is as follows:
- 500g flour
- 75g sugar
- 1 pinch of salt
- 200ml of lukewarm milk
- 100g soft butter
- 2 eggs
Just kidding, we are not beginning to bake a cake now or are we?
You will need to have at least one server which will be used for the master components.
What is kubeadm?
kubeadm is the official Tool to configure a kubelet, which is the node component of Kubernetes, to run in master or node “mode” in the end.
There are other tools / ways to deploy Kubernetes, which awill be listed in the upcoming sub section.
Reason why kubeadm is used here is simply because it is an official tool which is “guaranteed” to work with the Kubernetes version released (they follow the same release cycle).
“Alternatives” / Additions to kubeadm
- Kubespray - Ansible deployment for Kubernetes.
- kublr - “Reliable, Secure Container Management - Designed for modern enterprise”.
- Kelsey Hightower’s Kubernetes The Hard Way - If you want to learn “everything” about Kubernetes, follow the guide and it will lead you down the rabbit hole of Kubernetes.
- One of the many Cloud Kubernetes solutions:
- Google Kubernetes Engine (GKE)
- Azure Kubernetes Service (AKS)
- Amazon Managed Kubernetes Service (EKS)
Many factors play into what is the right way for you to run / install / buy Kubernetes, this Kubernetes documentation page can help you with a list of “all” available solutions: Picking the right solution - Kubernetes documentation.
What are kubeadm’s prerequisites?
Hard- / Software-Requirements are as follows:
- Servers must have at least 2 CPU (cores / threads) and at least 2GB of RAM.
- OS: Linux or Windows
- Linux: Recommended to have Kernel 4.x or better.
- Windows: Support was just added with Kubernetes v1.14.
- Container runtime:
- Docker
- A ContainerRuntimeInterface (CRI) compatible container runtime
- E.g., containerd, CRI-O,
Steps to your own Kubernetes cluster
Stop, Architecture time!

Kubernetes Cluster architecture
More detailed information on each component with some insights, will be given later.
Network Architecture
A Kubernetes cluster always requires at least two IP ranges:
- Service / Cluster IP address range - IP address range to select IPs for Services from.
- Pod IP range - IP address range to select an IP for each non-
hostNetworkPod in the Kubernetes cluster.- This can be “optional” depending on, e.g., the CNI plugin you are using and other factors.
kubeadm Installation
The instructions for the kubeadm and kubelet installation have been taken from the Kubernetes documentation, see Installing kubeadm - Kubernetes documentation.
NOTE
An important point to mention is that
kubeadmis only doing the configuration of thekubelet, which will then take care of spawning the components needed. This means that we need to care to install the correct version of bothkubeadmandkubeletpackages.
To be able to install the packages we need to add the Kubernetes repository for RHEL-based systems:
cat <<EOF > /etc/yum.repos.d/kubernetes.repo
[kubernetes]
name=Kubernetes
baseurl=https://packages.cloud.google.com/yum/repos/kubernetes-el7-x86_64
enabled=1
gpgcheck=1
repo_gpgcheck=1
gpgkey=https://packages.cloud.google.com/yum/doc/yum-key.gpg https://packages.cloud.google.com/yum/doc/rpm-package-key.gpg
exclude=kube*
EOF
Well.. SELinux everyone has it enabled, right guys? Right now it is recommended to disable SELinux. At one point we can hope for good SELinux support for Kubernetes.
Let’s go ahead and disable it:
# Set SELinux in permissive mode (effectively disabling it)
setenforce 0
sed -i 's/^SELINUX=enforcing$/SELINUX=permissive/' /etc/selinux/config
After that we can just go ahead and install the following packages and enable the kubelet service:
kubelet- The node component of Kubernetes, which takes care of talking with the container runtime to run containers.kubeadm- The “configuration utility” for thekubelet.kubectl- Kubernetes client utility, doesn’t hurt if it is on every server, no matter if just a node. It is only “needed” on the master(s) because we will use the master VM to access the Kubernetes API through it.
dnf install -y kubelet kubeadm kubectl --disableexcludes=kubernetes
systemctl enable --now kubelet
# Set the "new" K8S CNI plugins path for the kubelet (because Docker is used we can do it on the kubelet)
sed -i 's|KUBELET_EXTRA_ARGS=|KUBELET_EXTRA_ARGS=--cni-bin-dir=/opt/cni/bin,/usr/libexec/cni |' /etc/sysconfig/kubelet
NOTE
CNI plugin path fix: In case of other CRI compatile container runtimes, e.g., containerd, CRI-O, this would need to be done in the container runtimes config file(s).
After that we can go ahead and setup the initial master for the Kuberntes cluster using kubeadm.
Setting up the initial master of the Kubernetes cluster
NOTE
Only run this on the first master server! The other master servers don’t need to be
initialized, they need to be joined to the first Kubernetes master server.For more information on high availability Kubernetes clusters, see Creating Highly Available Clusters with kubeadm - Kubernetes.
To setup the initial master of the Kubernetes cluster, we will use the kubeadm init command:
$ kubeadm init \
    --pod-network-cidr=100.64.0.0/13 \
    --service-cidr=100.72.0.0/13
[init] Using Kubernetes version: v1.14.1
[preflight] Running pre-flight checks
	[WARNING IsDockerSystemdCheck]: detected "cgroupfs" as the Docker cgroup driver. The recommended driver is "systemd". Please follow the guide at https://kubernetes.io/docs/setup/cri/
[preflight] Pulling images required for setting up a Kubernetes cluster
[preflight] This might take a minute or two, depending on the speed of your internet connection
[preflight] You can also perform this action in beforehand using 'kubeadm config images pull'
[kubelet-start] Writing kubelet environment file with flags to file "/var/lib/kubelet/kubeadm-flags.env"
[kubelet-start] Writing kubelet configuration to file "/var/lib/kubelet/config.yaml"
[kubelet-start] Activating the kubelet service
[certs] Using certificateDir folder "/etc/kubernetes/pki"
[certs] Generating "ca" certificate and key
[certs] Generating "apiserver" certificate and key
[certs] apiserver serving cert is signed for DNS names [k8s-c1-master-1.eden.run kubernetes kubernetes.default kubernetes.default.svc kubernetes.default.svc.cluster.local] and IPs [100.72.0.1 159.69.244.41]
[certs] Generating "apiserver-kubelet-client" certificate and key
[certs] Generating "front-proxy-ca" certificate and key
[certs] Generating "front-proxy-client" certificate and key
[certs] Generating "etcd/ca" certificate and key
[certs] Generating "etcd/server" certificate and key
[certs] etcd/server serving cert is signed for DNS names [k8s-c1-master-1.eden.run localhost] and IPs [159.69.244.41 127.0.0.1 ::1]
[certs] Generating "etcd/peer" certificate and key
[certs] etcd/peer serving cert is signed for DNS names [k8s-c1-master-1.eden.run localhost] and IPs [159.69.244.41 127.0.0.1 ::1]
[certs] Generating "etcd/healthcheck-client" certificate and key
[certs] Generating "apiserver-etcd-client" certificate and key
[certs] Generating "sa" key and public key
[kubeconfig] Using kubeconfig folder "/etc/kubernetes"
[kubeconfig] Writing "admin.conf" kubeconfig file
[kubeconfig] Writing "kubelet.conf" kubeconfig file
[kubeconfig] Writing "controller-manager.conf" kubeconfig file
[kubeconfig] Writing "scheduler.conf" kubeconfig file
[control-plane] Using manifest folder "/etc/kubernetes/manifests"
[control-plane] Creating static Pod manifest for "kube-apiserver"
[control-plane] Creating static Pod manifest for "kube-controller-manager"
[control-plane] Creating static Pod manifest for "kube-scheduler"
[etcd] Creating static Pod manifest for local etcd in "/etc/kubernetes/manifests"
[wait-control-plane] Waiting for the kubelet to boot up the control plane as static Pods from directory "/etc/kubernetes/manifests". This can take up to 4m0s
[apiclient] All control plane components are healthy after 15.502780 seconds
[upload-config] storing the configuration used in ConfigMap "kubeadm-config" in the "kube-system" Namespace
[kubelet] Creating a ConfigMap "kubelet-config-1.14" in namespace kube-system with the configuration for the kubelets in the cluster
[upload-certs] Skipping phase. Please see --experimental-upload-certs
[mark-control-plane] Marking the node k8s-c1-master-1.eden.run as control-plane by adding the label "node-role.kubernetes.io/master=''"
[mark-control-plane] Marking the node k8s-c1-master-1.eden.run as control-plane by adding the taints [node-role.kubernetes.io/master:NoSchedule]
[bootstrap-token] Using token: mqn3hg.p8r8p7yyi7ozoqbx
[bootstrap-token] Configuring bootstrap tokens, cluster-info ConfigMap, RBAC Roles
[bootstrap-token] configured RBAC rules to allow Node Bootstrap tokens to post CSRs in order for nodes to get long term certificate credentials
[bootstrap-token] configured RBAC rules to allow the csrapprover controller automatically approve CSRs from a Node Bootstrap Token
[bootstrap-token] configured RBAC rules to allow certificate rotation for all node client certificates in the cluster
[bootstrap-token] creating the "cluster-info" ConfigMap in the "kube-public" namespace
[addons] Applied essential addon: CoreDNS
[addons] Applied essential addon: kube-proxy

Your Kubernetes control-plane has initialized successfully!

To start using your cluster, you need to run the following as a regular user:

  mkdir -p $HOME/.kube
  sudo cp -i /etc/kubernetes/admin.conf $HOME/.kube/config
  sudo chown $(id -u):$(id -g) $HOME/.kube/config

You should now deploy a pod network to the cluster.
Run "kubectl apply -f [podnetwork].yaml" with one of the options listed at:
  https://kubernetes.io/docs/concepts/cluster-administration/addons/

Then you can join any number of worker nodes by running the following on each as root:

kubeadm join 159.69.244.41:6443 --token mqn3hg.p8r8p7yyi7ozoqbx \
    --discovery-token-ca-cert-hash sha256:4000680d6a69786e1d69c3f7aef7fd03c533665e00f35886e0d2b33754d3c03c
WDWD
kubeadm init- Initialize a Kubernetes cluster first master.--pod-network-cidr=100.64.0.0/13- Pod IP address range.--service-cidr=100.72.0.0/13- Service / Cluster IP address range.
- In the output:
mkdir [...]+sudo cp+sudo chown- These commands copy thekubeconfigwhich contains the access credentials to the cluster to the default location, so thekubectlcan pick it up without any changes to it’s configuration.kubeadm join [...]- The command which allows us to join other servers into the cluster.
This will pull the images needed by the kubelet as the so called “pause image”, besides in case of the master the images for the Kubernetes master components are also pulled, and generate configurations for those components.
After the kubeadm init command ran successfully make sure to copy the command beginning with kubeadm join to a safe location, it is needed later on.
The Kubernetes master components consist of:
etcd- It is either run as Pod inside the cluster as is done with the “default” cluster installation fromkubeadm, but an “cluster external” etcd could also be used.kube-apiserver- The API server is the “gateway” to the etcd with the other components, likekubelet,kube-controller-managerandkube-scheduler.kube-controller-manager- Taking care of management aspects such as, for Services of type NodePort to select a free port in the configured range, make sure nodes are marked asNotReadywhen they have not updated themselves at the APi for sometime, and more control loops, making sure Deployments and other “replicasobject type” are at their desired and if not try to bring them to the desired state, and many .kube-scheduler- Takes care of the scheduling of Pods in the Kubernetes cluster depending on various factors like total node resources requests. Also if supported by the storage driver thekube-schedulerwill take location of the storage (PersistentVolumes) into account.
For a more detailed view on what each Kubernetes component, see Kubernetes Components - Kubernetes.
Then we just need to configure the kubectl (only) on the master server to be able to talk with Kubernetes cluster we just created:
mkdir -p $HOME/.kube
cp -i /etc/kubernetes/admin.conf $HOME/.kube/config
chown $(id -u):$(id -g) $HOME/.kube/config
Finally on the master server, run kubectl get componentstatus to get the current component status and kubectl get nodes to get the list of nodes of cluster which should only return the master server we are on right now.
$ kubectl get componentstatus
NAME                 STATUS    MESSAGE             ERROR
controller-manager   Healthy   ok
scheduler            Healthy   ok
etcd-0               Healthy   {"health":"true"}
$ kubectl get nodes
NAME                       STATUS     ROLES    AGE     VERSION
k8s-c1-master-1.eden.run   NotReady   master   2m33s   v1.14.1
It is okay for the node to be in NotReady status, because we currently have not deployed a network. This will be done in the next section.
Errors during kubeadm execution
WARNING
This will remove all Kubernetes related data on the master and node that you are running the “reset” command on.
If you should encounter issues with kubeadm failing during, e.g., kubeadm join or kubeadm init, you can do a reset of that node:
kubeadm reset -f
# Clear iptables rules
iptables -F && iptables -t nat -F && iptables -t mangle -F && iptables -X
# Clear ipvs rules
ipvsadm --clear
WDWD
-f- In this case stands for “force”, this will just “reset” the node and make it ready to bekubeadm inited orkubeadm joined again.
Let’s add some network to the cluster first
Before we go ahead and join the two node servers we have “join” the Kubernetes cluster, let’s install a network. The network install must be done on the master and only once.
In this case Flannel will be used as the network provider, as it is the most basic one which should work no matter what.
NOTE
The IP address range used for the Pods will be
100.64.0.0/13which is part of100.64.0.0/10space normally used for carrier-grade NAT.
$ curl -O \
    https://raw.githubusercontent.com/coreos/flannel/a70459be0084506e4ec919aa1c114638878db11b/Documentation/kube-flannel.yml
$ sed -i -e "s?10.244.0.0/16?100.64.0.0/13?g" kube-flannel.yml
$ kubectl apply -f kube-flannel.yml
Running the following command will show you the Pods in the kube-system namespace and there you should hopefully already see at least one kube-flannel-* Pods:
kubectl get -n kube-system pod
Join each node server into your Kubernetes cluster
On the master server run the following command to print out the “join” command for the nodes:
$ kubeadm token create --print-join-command
kubeadm join --token 447067.20b55955bd6abe6c 192.168.99.100:8443 --discovery-token-ca-cert-hash sha256:17023a5c90b996e50c514e63e161e46f78be216fd48c0c3df3be67e008b28889
Copy the command to the two nodes and run it on them.
After a few seconds / minutes the command should exit successfully and you should be able to see the two nodes in the nodes list on the master (kubectl get nodes):
$ kubectl get nodes
NAME                       STATUS     ROLES    AGE     VERSION
k8s-c1-master-1.eden.run   Ready      master   5m33s   v1.14.1
k8s-c1-worker-1.eden.run   Ready      <none>   46s     v1.14.1
k8s-c1-worker-2.eden.run   Ready      <none>   10s     v1.14.1
Test the Kubernetes cluster health
TASK:
kubernetes404
In the task kubernetes404 directory is a file called busybox.yaml. We will now deploy this file onto our cluster.
The file looks like this:
apiVersion: v1
kind: Pod
metadata:
  name: busybox
spec:
  containers:
  - image: busybox
    command:
      - sleep
      - "3600"
    imagePullPolicy: IfNotPresent
    name: busybox
  restartPolicy: Always
Connect to the Kubernetes master server and in the task directory kubernetes101 run the following command to create the busybox Pod:
kubectl create -f busybox.yaml
The syntax of the busybox Pod object manifest, is a bit similar to the syntax of docker-compose files. It should get clear when you look at some other examples.
Run kubectl get pod busybox to see the status of the busybox Pod we created through the kubectl create command. The busybox Pod should be in Running state if it is not use kubectl describe pod busybox to show some general information and the events of the Pod. The events can help you find out what the issue is.
After that run the following command to make sure Pods can reach the Kubernetes API which should mean that the container network works fine.
$ kubectl exec busybox -- wget https://kubernetes.default.svc.cluster.local:443
Connecting to kubernetes.default.svc.cluster.local:443 (100.72.0.1:443)
wget: note: TLS certificate validation not implemented
wget: server returned error: HTTP/1.1 403 Forbidden
command terminated with exit code 1
If you get the error that is shown above (403 return status), the cluster should be okay now and I can welcome you to the Kubernetes Danger Zone!
If you should get a different output, something probably went wrong please contact me.

Welcome to the Danger Zone! - Taken from MemeGenerator.net
Let’s extend the Kubernetes cluster with cool features!
TASK:
kubernetes303
The task kubernetes303 directory contains some additional manifests to add some features like, an Ingress cntroller, a PersistentVolume provider using Rook Ceph operator for storage and Prometheus Monitoring for the cluster.
NOTE
In this as there are many different objects most depending in some on the other, for simplicity are just going to “brute force the system”. Ignore any “already exists” errors as they are okay.
Please enter the task directory and follow the “Create / Apply Order” in the README.md there.
The command to create the objects is
kubectl create -R -f DIRECTORY
WDWD
-R- Means recursive. Making thekubectl createrecurse through every sub directory in thekubernetes303/in this case.DIRECTORY- Is the current directory you want to create all objects from (Respect the “Create / Apply Order”!).
Network stuff. Because network in Kubernetes is “special”.
Let’s talk network!
NOTE
Do you want to look at complex network diagrams about Kubernetes? Checkout Kubernetes Network Explained - Edenmal Docs.
Requirements
- At least two un-routed IP ranges.
- IP range should have at least of CIDR size:
NUMBER_OF_NODES * IPV4 /24. It will be used for the Pods IPs by the SDN / Kubernetes. - IP range is used for Kubernetes
Service ClusterIPs.
- IP range should have at least of CIDR size:
- You should have at least 1G connection between the servers.
- If you have internet facing service, make sure that it is enough in general network capacity.
- => Talk with your network team!
- If you have internet facing service, make sure that it is enough in general network capacity.
- Load Balancer is recommended for production for the Kubernetes API (more details on the architecture follow soon).
SDN and CNI?
Equals for dynamic network for containers!
Glossar
- SDN stands for Software Defined Network
- CNI = Container Network Interface
What do they do?
The Container Network Interface in itself is a unified interface for any system to request “network”, e.g, an IP address.
There are many different CNI plugins available, here is a list of some:
- CoreOS Flannel: VXLAN Mesh network between the servers. The simplest network plugin that can span over more than one node.
- Project Calico: Either BGP + IP-IP or in form of Canal using Flannel for the traffic between the nodes.
- And many more Kubernetes - Cluster Networking …
kube-proxy - Takes care of Service ClusterIPs
The kube-proxy component must be run on every node as it takes care of making the ClusterIPs of the Services “available”.
The kube-proxy does this through either iptables or ipvs (which uses only a small amount of iptables rules), the default for new cluster is ipvs.
Reason for ipvs being the default is because it is performance-wise better than having “a billion” iptables rules on each node doing “routing” / filtering.
Why not connect to a Node and run iptables-save and ipvsadm -ln to check on what is going on.
TL;DR The
iptablesand / or IPVS “rules” take care of forwarding the traffic where it needs to be for ClusterIPs.
IPv6

'State of IPv6 and containers' - Image taken from Cheezburger.com
Oh boi, right now if you want dual stack network for your Pods you are in for a challenge. Dual stack is not really supported right now. It is either IPv4 or IPv6 in your cluster.
This is sadly due to bigger clouds not having IPv6 (by default) enabled and most companies not batting an eye.
A huge problem for users having DSL-Light, where you share one IPv4 address with many and often don’t have enough bandwidth over IPv4, though IPv6 is working fine you have most of the bandwidth all the time without any issues (+ port fowarding is active at most ISPs).
Deploying an application to Kubernetes
The kubectl utility allows us to create objects, in this section I’m going to cover how you can create Manifest files for Kubernetes objects.
BusyBox Pod Example
TASK:
kubernetes303
NOTE
The snippet below is from the file
busybox.yamlin thekubernetes303task.
You have already seen this example, but here again with more explanations:
apiVersion: v1
kind: Pod
metadata:
  name: busybox
  namespace: default
spec:
  containers:
  - image: busybox
    command:
      - sleep
      - "3600"
    imagePullPolicy: IfNotPresent
    name: busybox
  restartPolicy: Always
WDWD
apiVersion: v1- Sets the API version to use.kind: Pod- Sets the type / kind of the “obejct”.metadata: []- A list of metadata information, like what name or namespace to use.spec: []- A list of “specifications”. In this case containing a list of containers.containers:- List of containers, see next snippet for more information.restartPolicy: Always- Restart policy. In this case the Pod always restarts, until deleted.
- image: busybox
  command:
    - sleep
    - "3600"
  imagePullPolicy: IfNotPresent
  name: busybox
WDWD
- image: busybox- Use the busybox image. The-(minus) begins the list entry.command: []- The command to run in the container (not the entrypoint).imagePullPolicy: IfNotPresent- The image pull policy.name: busybox- The name of the container of the Pod.
Most things are seem similar but different to docker-compose.ymls, but if you know the basic syntax differences you should be good to go.
Kubessar - A Glossar but for Kubernetes
Like a glossar, but for Kubernetes stuff. So a Kubessar?
Labels
Labels are a way to.. well.. label objects, you can use these labels to “group” objects together and select them all together then.
For example a label selector looks like this: app.kubernetes.io/name=my-application or for multiple labels: app.kubernetes.io/name=my-application,app.kubernetes.io/version=1.2.3.
Kubernetes has a list of recommended label (names): https://kubernetes.io/docs/concepts/overview/working-with-objects/common-labels/.
Annotations
Annotations are kind of like labels just from the concept of key-value pairs, but you can’t filter on annotations.
Annotations are meant to hold information of, e.g., an application Deployment, which is there is no need to select the objects on.
Namespace
Separation of resources. Allowing for quotas per namespace.
When not specifying a namespace in the kubectl command, if set the namespace configured in the kubeconfig ($HOME/.kube/config) else default namespace will be used.
Pod (po)
A Pod is a logical construct of one or more containers that will run together and share the same context. The one or more containers of a Pod share the same network context, meaning they have the same interface (= IP address).
Deployment (deployment)
A Deployment is a way to deploy your application and always keep a specific number of replicas of the application running.
In addition to that when the Deployment object is edited there will be a history retained, the sub section ReplicaSet will give more insight into this.
ReplicaSet (rs)
When a Deployment is created or updated a ReplicaSet is created per creation / change to the Deployment. The ReplicaSet is an imprint of the current state of the Deployment. This is the history part of the Deployment.
Service (svc)
Exposed one or more Ports of Pods which are selected by a label selector. The access to the port(s) is “load balanced” using iptables or ipvs depending on how the cluster has been setup. In the upcoming cluster installation, the component which “configures” these Service IPs on each node will use ipvs.
When you create a Service, a A and SRV DNS record is created so that you can access the server through a “static” DNS name.
wordpress.default.svc.cluster.local
NAME.NAMESPACE.svc.cluster.local
(where cluster.local is the default cluster DNS suffix)
In addition to that there are three types of Service available:
ClusterIP
An IP address, which is the so called Service IP range, which is only reachable on the port(s) exposed by the service. This means that an ICMP ping won’t work.
NodePort
A NodePort Service is based on the ClusterIP Service type.
The addition is that as the name may imply a port is opened on every node of the cluster (by default) which is in the so called node port range (30000-32767).
LoadBalancer
A LoadBalancer in a nutshell is a NodePort service which triggers the creation and automatic configuration of a LoadBalancer in the environment (e.g., in a Kubernetes as a Service cloud, Kubernetes in OpenStack).
Other Objects
- StatefulSet - Deployment like object but with a “twist” in regard to persistence (PersistentVolumeClaims).
- PersistentVolumeClaims and PersistentVolumes - Claims are for requesting storage and the PersistentVolumes are the “mapping” part for Kubernetes and storage system / software (
storage system / software <-> Kubernetes). - ResourceQuota - Resource quotas for a namespace in regards to compute resources but also actual objects.
- Nodes - Information about nodes in the cluster.
Object Manifest files
Manifest files can be either in a YAML and / or JSON format which Kubernetes is able to understand and interpret accordingly. These files are descriptors / specifications for Kubernetes objects and can be created, edited, updated and deleted on a Kubernetes cluster using the kubectl Kubernetes client tool.
kubectl - Our tool to catch deploy them all
Kubernetes - 'It's dangerous to go alone' *Zelda Meme intensifies*
The Basics of kubectl
The kubectl command is used to create new “objects”, view Pods, ReplicationController and all other available objects in Kubernetes.
Get / List objects
To view all Pods in all namespaces of the Kubernetes cluster:
kubectl get -n NAMESPACE pods
WDWD
kubectl- The kubectl command.get- Get “objects” from kubernetes API.NAMESPACE- Name of the namespace you want to get objects from.--all-namespaces- Show objects from all namespaces.pods- Show only Pods (Can be a comma seperated list of types, short forms are available).
Getting / Listing objects using label selectors
Labels are an important of Kubernetes as they allow you to “group” your objects when selecting them.
Meaning for example if you have certain components that are for the backend, you could add a label to them role = backend and the frontend components with role = frontend.
Kubernetes has a list of rcommended labels to use for applications: https://kubernetes.io/docs/concepts/overview/working-with-objects/common-labels/.
You can basically specify “anything” as a label, so you are able to select your objects fine grained on your own accord.
Gather information about one or more object(s)
Get pretty formatted informations about one or more object(s):
kubectl describe --namespace=NAMESPACE TYPE/NAME (TYPE/NAME ...)
WDWD
describe- Call the describe routines.--namespace=NAMESPACE- Set namespace to search in (optional when set through kubeconfig file).TYPE- The type of objects to show. For examplepod,deployment(for Deployment).NAME- Name of the object to show. For our WordPress Pod, would bewordpress.
Create one or more object(s) in Kubernetes
To create Kubernetes objects through a manifest file or through commands, the create subcommand is used:
Creating objects through a manifest file
kubectl \
    create \
    -f FILE_NAME
WDWD
create- Subcommand.-f FILE_NAME- Can be one file, a directory or-for stdin. When a directory is specified, files are read in alphabetical order.
Create, e.g., a ConfigMap through the kubectl create subcommands
kubectl \
    create \
    configmap OBJECT_NAME \
    --from-file=path/to/file \
    --from-literal="key=value"
WDWD
create- Subcommand.configmap- Type of object to create.OBJECT_NAME- The name of the object.--from-file=path/to/file- Takes the file path and puts it in a key named after the file path.--from-literal="key=value"- Takes a key-value pair and puts it in the ConfigMap.
Delete one or more object(s)
To delete one or more object(s), there’s the delete subcommand:
kubectl delete -f FILE_NAME
WDWD
delete- Deletes specified object(s).-f FILE_NAME- Can be one file, a directory or-for stdin. When a directory is specified, files are read in alphabetical order.
Or
kubectl delete TYPE/NAME (TYPE/NAME ...)
WDWD
delete- Deletes specified object(s).TYPE- The type of objects to show. For examplepod,deployment(for Deployment).NAME- Name of the object to show. For our WordPress Pod, would bewordpress.
Execute command inside a Pod’s container
Using the exec subcommand, with almost the same syntax as docker exec:
kubectl exec OPTIONS POD_NAME (-c CONTAINER_NAME) COMMAND
WDWD
exec- Deletes specified object(s).OPTIONS- For example-ifor interactive, see the help menu for more information.POD_NAME- Name of the object to show. For our WordPress Pod, would bewordpress.-c CONTAINER_NAME- Optional. If the specified Pod has more than one container, then it is required.COMMAND- The command to run inside the container.
If you are trying to exec into a Pod with multiple containers and have not selected a container using the -c flag, kubectl exec will “complain” about it and print a list of containers.
View the logs of a Pod’s container
The logs subcommand, has almost the same syntax as docker logs with some Kubernetes Pod object related flags sprinkled in.
kubectl logs OPTIONS POD_NAME (-c CONTAINER_NAME) COMMAND
WDWD
exec- Deletes specified object(s).OPTIONS- For example-ffor follow the output, see the help menu for more information.NAME- Name of the object to show. For our WordPress Pod, would bewordpress.-c CONTAINER_NAME- Optional. If the specified Pod has more than one container, then it is required.
If you are trying to get the logs of a Pod with multiple containers and have not selected a container using the -c flag, kubectl logs will “complain” about it and print a list of containers.
Advanced kubectl usage
Editing an existing Deployment object
The edit subcommand allows you to edit an object which for, e.g., Deployment, StatefulSet:
kubectl edit TYPE OBJECT_NAME
WDWD
edit- Rolling update subcommand.TYPE- The type of object to edit.OBJECT_NAME- Name of object to be edited.
Scaling a Deployment
The scale subcommand allows you scale the replicas size of a given object:
kubectl scale TYPE OBJECT_NAME --replicas=SIZE
WDWD
scale- Scale subcommand.TYPE- The type of object to edit.OBJECT_NAME- Name of object to be edited.--replicas=SIZE- Set the replicas for the object.
Summary of the Day
If you are reading this, you have made it to the end of day #2. Well done, sir or madam, have a second cookie!

Here is a Cookie (from Memegen)
I hope everyone had a good time during the training’s first day and has taken new knowledge with them already. If you have any feedback about the training itself or the materials, please let me know in person or email me at me AT galexrt DOT moe.
Have Fun!